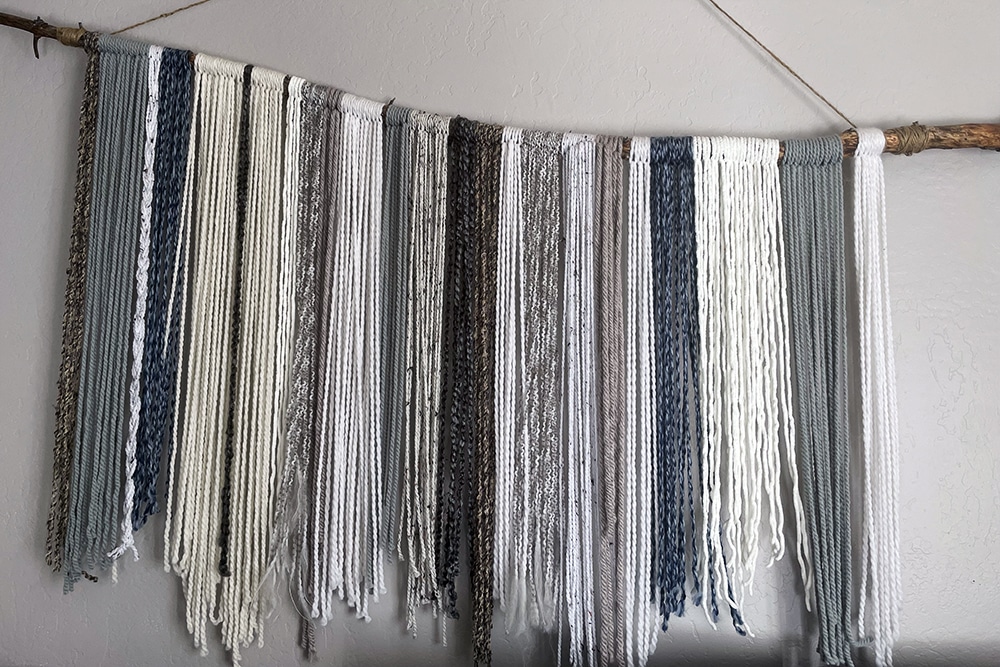


For National Handmade Day (as in make-something-with-your-hands day not celebrate-the-Gilead-ways-of-life day), I wanted to find the perfect DIY craft to feature that was affordable, customizable and easy enough that anyone can do. I give you (drumroll, please)—a bohemian yarn wall hanging, perfect to fill that blank office or dorm wall or add an interesting accent above your couch or bed.
There are so many reasons why I love this craft (and why I have three separate wall hangings in different rooms of my house), but here are the top three:
- Only THREE supplies needed!—And two of them you probably have lying around your house or yard already.
- Completely customizable—From the color yarn you choose to the size of the stick or dowel, this craft is perfect to fill big and small spaces and so easy to match to your already existing décor!
- Ridiculously easy—If you can cut yarn (and it doesn’t even need to be straight!), you’re well on your way to creating a beautiful eye-catching art piece for your wall.
This is also a great craft to do in a group. I hosted a craft night with friends that allowed me to get a ton of different yarn, split the cost between everyone and still have leftovers for additional tapestries!
So, without further ado, here’s everything you need to recreate this boho wall art.
SUPPLIES
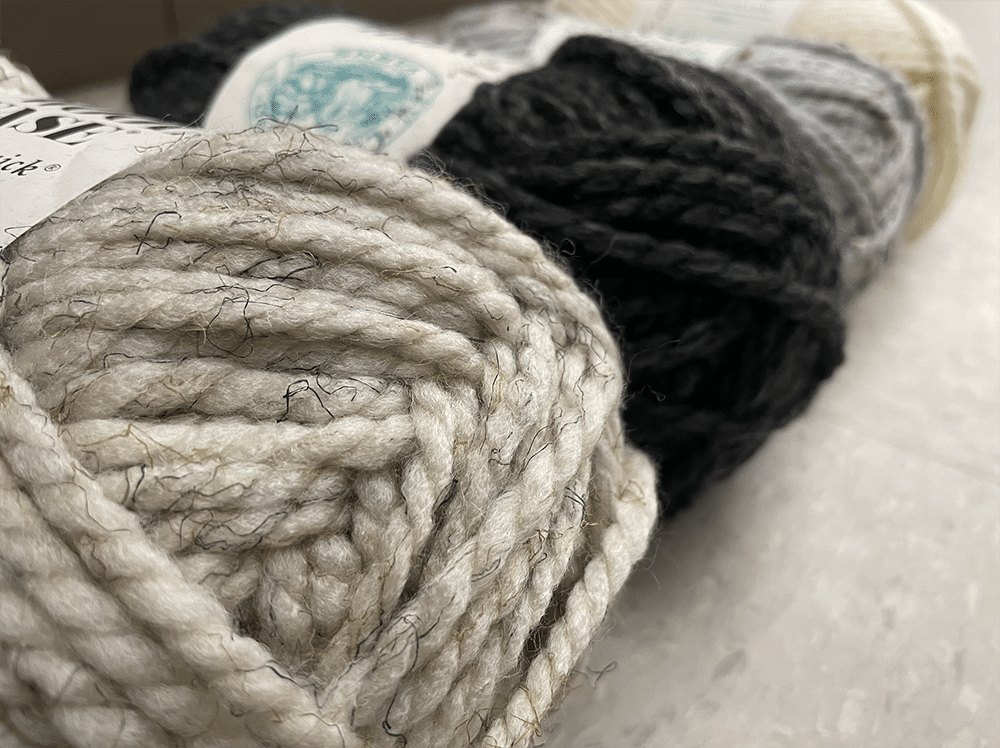
 Yarn—as few as two colors or as many as 10+ depending on how you want your wall hanging to look. TIP: I usually wait until Joanne’s or Michael’s has a sale, then stock up on cute yarn. I like to get a variety of different kinds—fat/skinny, speckled/plain, wool/felt—and like to make sure the colors I pick fit the space I intend the wall hanging to go. My guest bedroom has light gray walls, darker gray comforter, white curtains and a dark blue chair. So, the colors I picked out were various shades of white, gray, blue, and tan/brown to tie in the carpet.
- Scissors
- Dowel or stick—This can be as long or as short as you’d like, depending on where you choose to hang your yarn art. I like the rustic, natural feel of using a stick (aside from it being free, it gives you an excuse to take a walk around our beautiful forests), but if you prefer a more finished look, purchase an unfinished dowel from your local craft store. TIP: If you go the stick route, choose a fairly fat stick. Though yarn is not heavy, the weight can add up. The last thing you want is a twig snapping halfway through your project.
- Twine (optional)
INSTRUCTIONS
- Gather your supplies. (Yarn, scissors and dowel/stick.)
- K
 nowing they will double over, cut strands of yarn to your desired length. If you want to fill a three-foot tall space (which is great for over the couch or bed), yarn should be cut about six feet long. For a smaller wall piece, cut strands to three feet. Hold your doubled-over, cut piece of yarn up to your stick or dowl to make sure it is the length you want.
 - Use your cut piece of yarn to measure additional strands. TIP: If you’re going for an unfinished, jagged-edge bottom, make sure you cut varying lengths. For my over-the-bed wall hanging, I varied in length from six to seven feet.
- Repeat steps two and three with each color of yarn, making sure you have a good amount of each yarn.
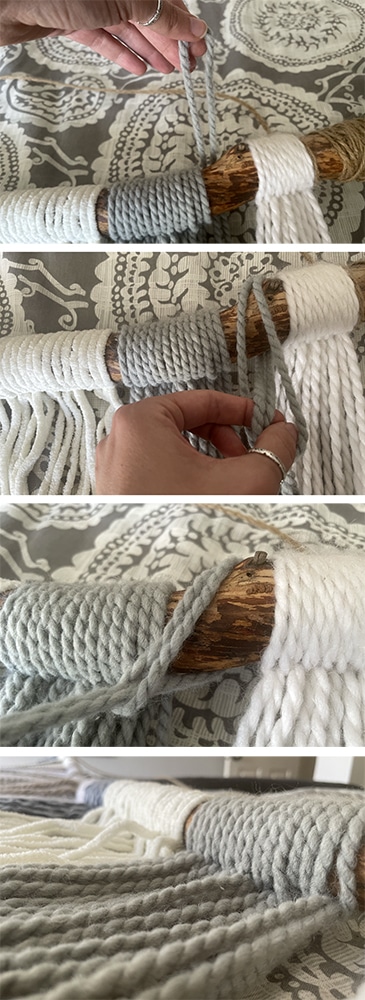
- Start with one color of yarn. Tie a strand onto your stick or dowel by doubling over the yarn so the loop is at the top, behind the stick or dowel.
- Use your thumb and index finger to pull the dangling yarn through the loop. Pull until it is tight around the rod, but still has some wiggle room.
- Repeat steps five and six, incorporating your different-colored yarn in chunks (can range from two strands to 10+ depending on the look you are going for), until your stick or dowel is full, leaving a couple inches on each end. TIP: Resist the urge to overpack your dowel with yarn. It looks better if each strand has a little room to breathe.
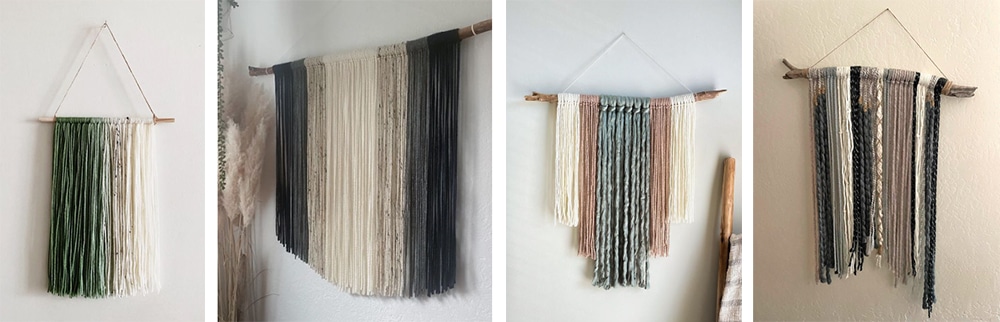
- Once you are happy with your color arrangement, feel free to use scissors to cut the bottom of your yarn strands. Whether you choose to even them out for a clean look, round them out, cut in stairstep-style or create a more jagged, uneven look, channel your inner artist and snip away! (See inspiration above.)
- Hang your wall tapestry by simply sitting this on two long nails, or tie some extra yarn or twine to the ends (that is roughly the length-and-a-third of your stick/dowel). Since my wall hanging was so large, I braided three strands of twine together to better bare the weight.
- Sit back and enjoy your creation!
 nowing they will double over, cut strands of yarn to your desired length. If you want to fill a three-foot tall space (which is great for over the couch or bed), yarn should be cut about six feet long. For a smaller wall piece, cut strands to three feet. Hold your doubled-over, cut piece of yarn up to your stick or dowl to make sure it is the length you want.
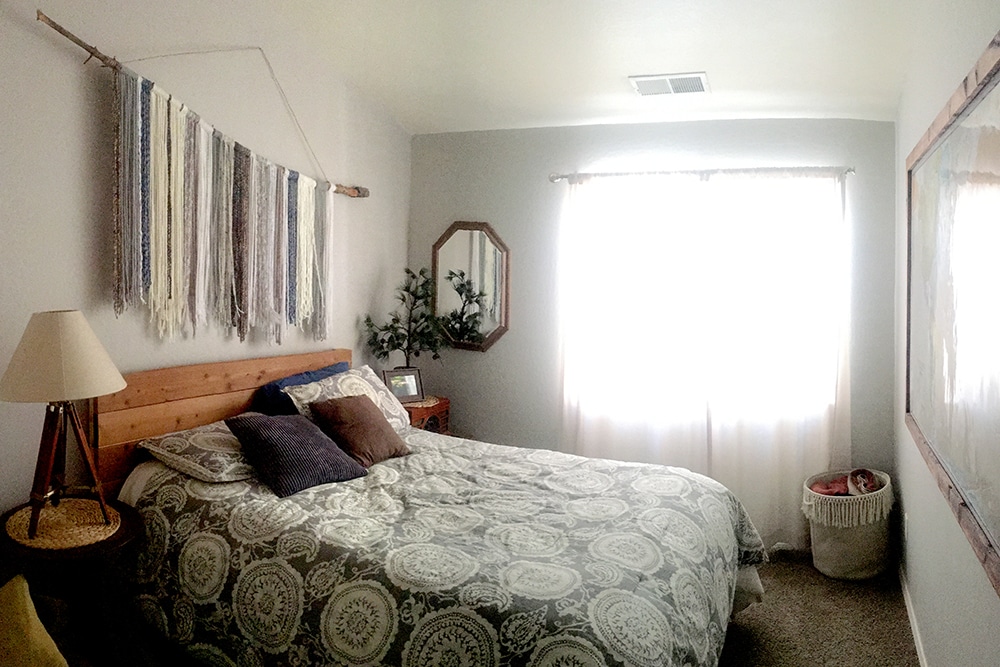

Carly Banks | NAU Communications
(928) 523-5582 | carly.banks@nau.edu